Choosing the Gear
Step One: Digital recording interface
This converts an analog signal (microphone, analog line out, or analog instrument out) to digital. The price depends on the quality of the mic preamps, the latency (speed) of the interface, and the number of simultaneous channels you can capture.
There are lots of choices for interfaces, but my two favorite brands are:
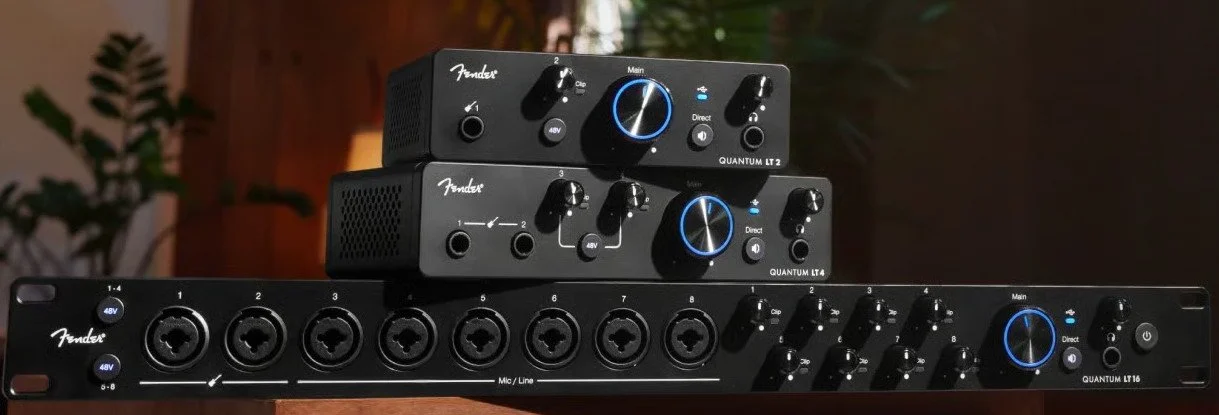
Fender (used to be called Presonus, my personal favorite). Their new Quantum HD line achieves similar extremely low latency with a more standard USB-C port by writing custom drivers. They also now have a less expensive Quantum LT Iine. I use their legacy Quantum interface.
Focusrite, especially their higher end Scarlett line.
The number of inputs you require is a function of the number of channels you need to simultaneously record. If you are recording vocals only you will need one channel and one mic. If you are recording a horn, acoustic bass, or mic'd bass/guitar cabinet you may want two channels and two mics - one channel for the instrument mic and one for a vocal microphone. Even if you are not recording vocals, you probably want to have a second mic and a second channel for a talkback mic for online collaboration - set up each mic for optimal positioning and output gain.
If you are recording a direct one channel instrument like electric guitar or electric bass, you can plug your 1/4 inch instrument cable into an input that will accept 1/4 inch instrument level in addition to line level XLR) and your vocal mic into channel 2. If you choose to plug your guitar or bass directly into the instrument input you will want to use an amp emulator in your DAW software to shape the raw input sound (see below).
If you are recording a stereo direct instrument such as a keyboard with internal sounds you can send 1/4 inch direct outs to channels 1 and 2 (if the interface takes line level 1/4 inch on channels 1 and 2). But if you also want a vocal mic for online collaboration, you will need a 4 channel or greater interface so you can plug a vocal mic into channel 3.
For drums you really need at least 4 channels, and generally 8 or more. Start with two overheads, one mic on kick, and one mic on snare and grow from there. If you get a 4 channel unit you can use the overheads for your vocal mic for collaboration, but it is easier and better to have a dedicated vocal mic with a switch if you have the channels.
My favorite online recording gear merchants are Sweetwater Sound and B&H Photo. Check for pricing and delivery speed. I have no connection, other than being a customer, with either of them.
Step 2: Digital Audio Workstation (DAW)
Your DAW is the software that captures the signal from your interface and lets you process, record, mix and master your recordings. It also allows you to connect a MIDI keyboard to your computer and then use voices from your DAW for that instrument.
Almost all of the major DAWs are hardware agnostic, so you can use either a Mac or a Windows PC. (Note that Windows users will need to install and use an Asio sound driver such as the free Asio4All instead of the standard Windows sound driver.)
That said, the audio technology and plug and play is superior on a Mac. My recommendation is that you start with the hardware you already own (including Windows), and then decide if you need to upgrade as you go along. I currently use Mac Minis for tracking and mixing, but I have used also use a Macbook Pro. A Macbook Air will work for smaller sessions. Apple's Mac Studio is the gold standard for digital creators, but it is overkill for most home studios.
The most commonly used DAW in the professional world is Pro Tools from Avid. It has been around the longest, and many engineers find it easy to use because they learned the keyboard shortcuts long ago. It also makes it easy to pass a session from one engineer to another. That said, I don't like Pro Tools, and I am not alone in that camp. It is old technology, and has a steep learning curve. Apple's Logic Pro (Mac only) is very popular amongst the Mac based solo singer/songwriter set for its power and flexibility.
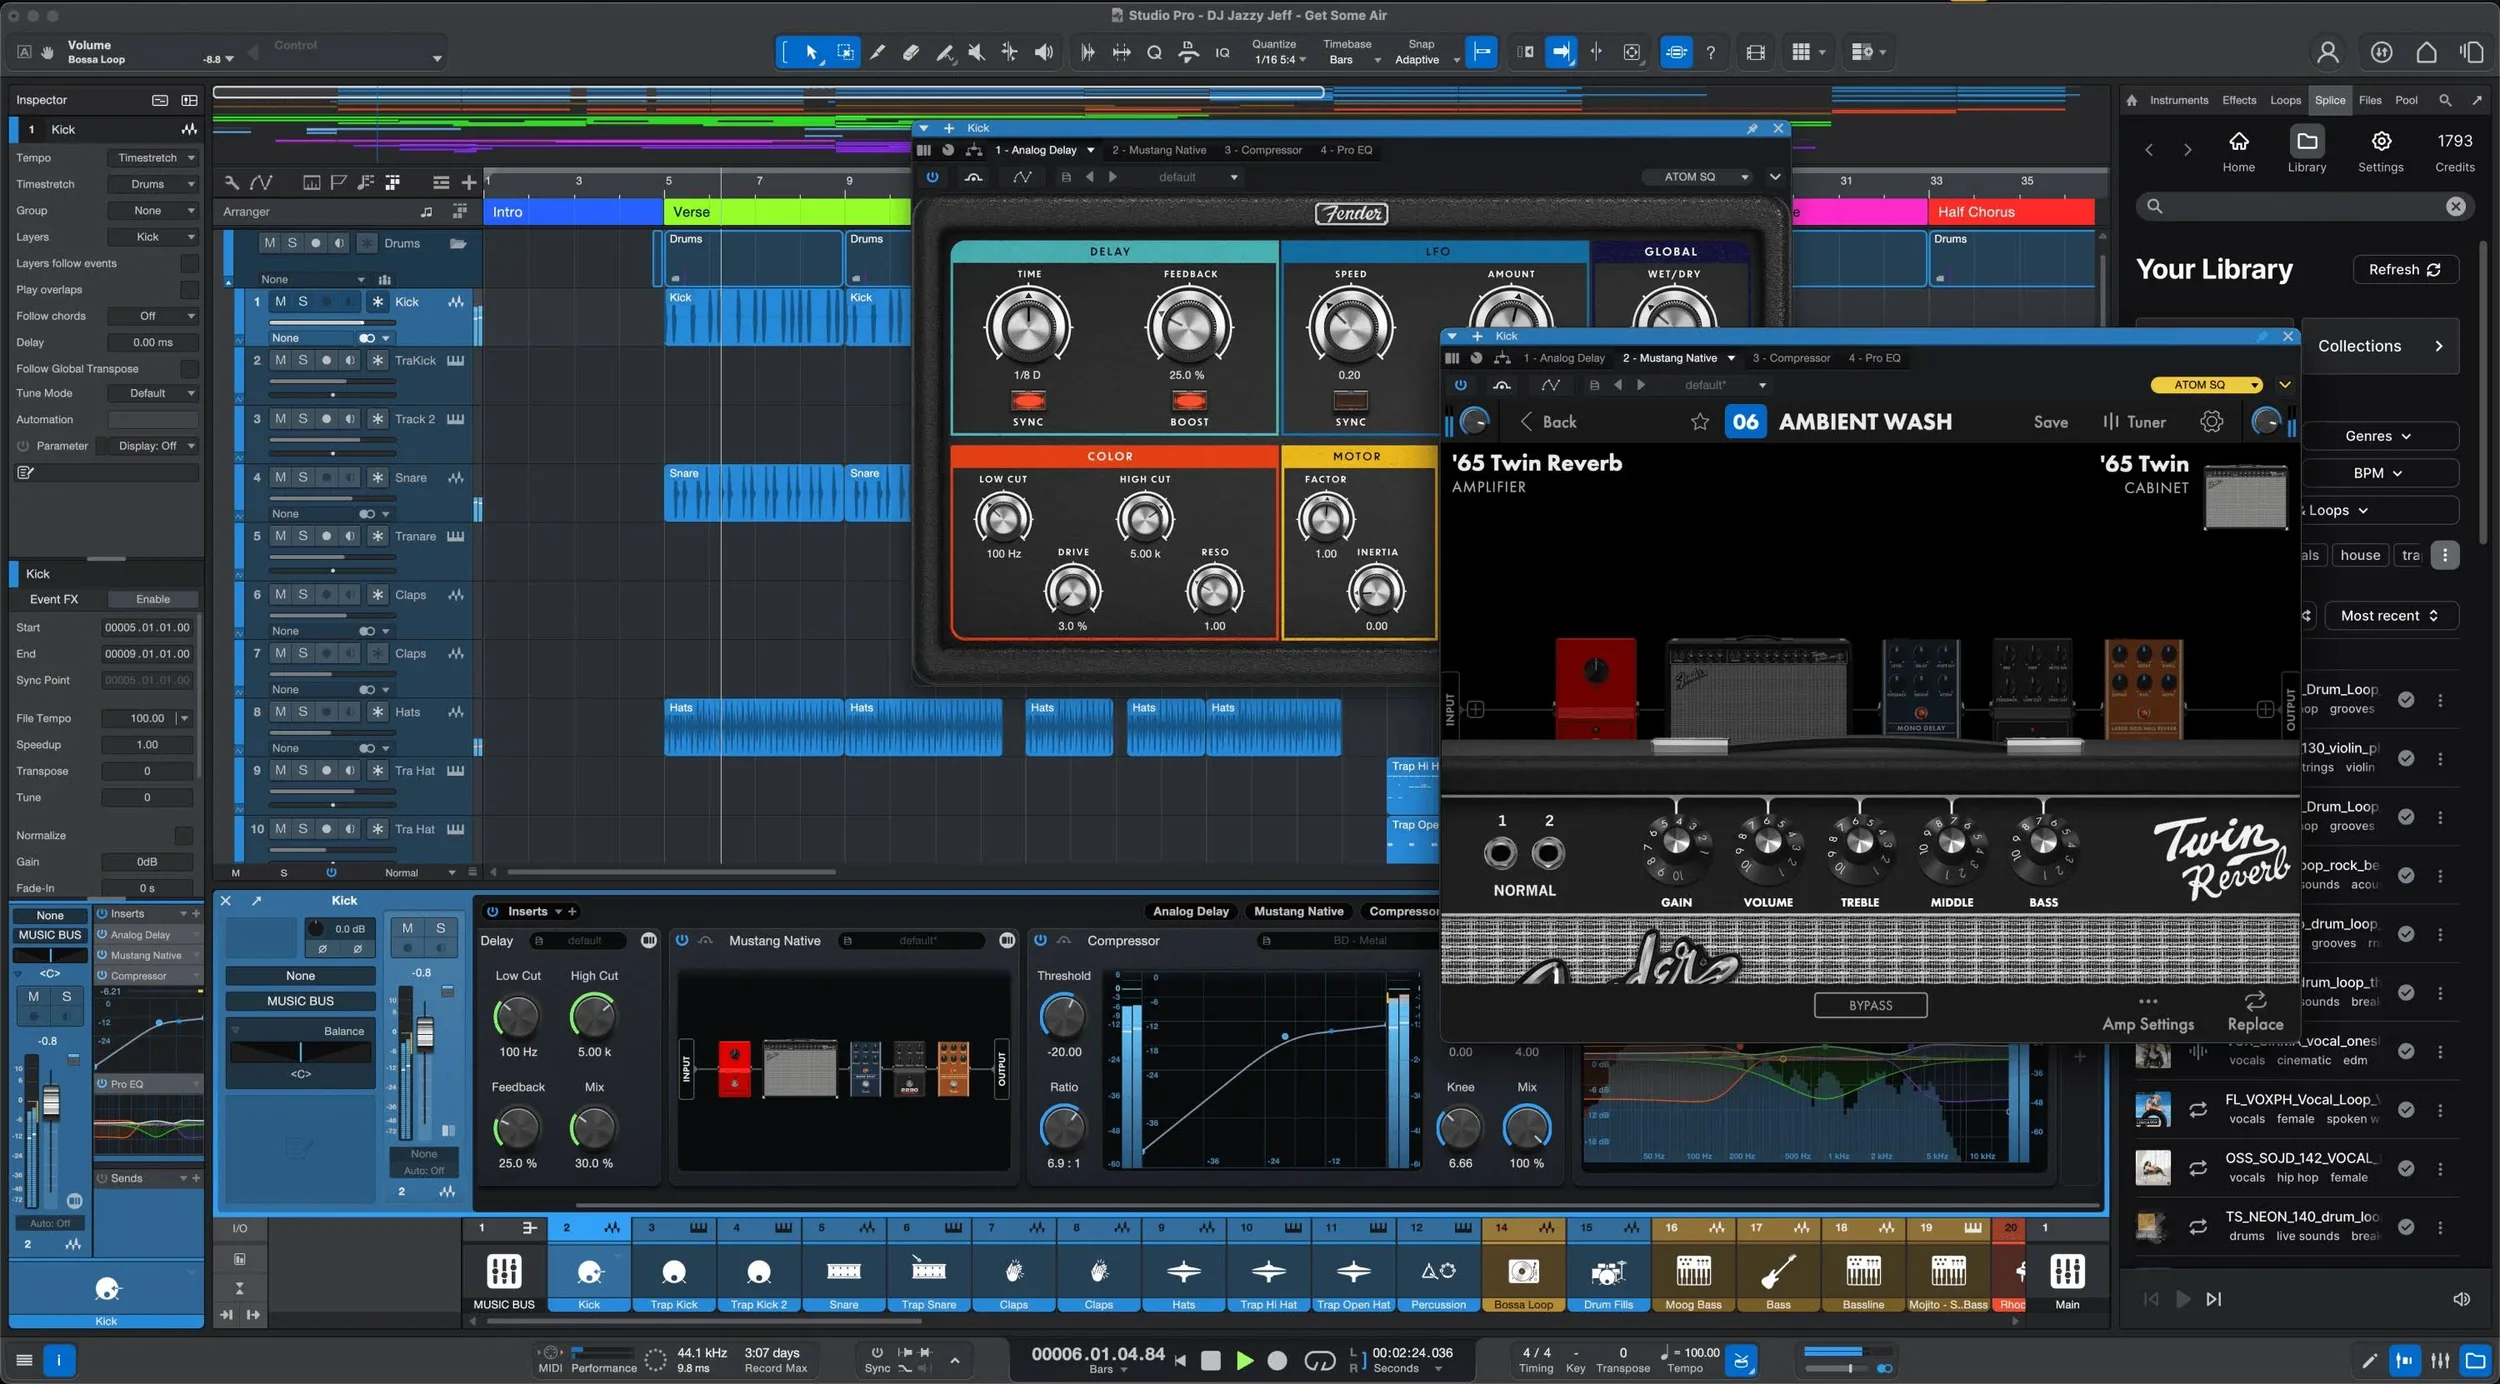
I prefer Fender Studio Pro (recently rebranded from the longstanding Presonus Studio One) and have used it since its first version was released many years ago. It is intuitive, extremely powerful, and also has a fully integrated mastering suite as well as a live performance suite. I find its workflows to be super efficient. As an alternative to purchasing a license, I subscribe to the perpetual license with Pro Annual Plan which gives you access to the latest version of Studio Pro and all of the plug-ins and software that Fender makes. It is a great deal at 20 bucks a month or $180/year.
There are lots of online resources to help you learn how to use Studio Pro including the free resources on Fender’s YouTube Channels. Fender’s Joe Gilder's channel focuses on recording and mixing live instruments, while his colleague Gregor's channel approaches many of the same objectives from the virtual instrument side.
Joe Gilder additionally offers free videos on mixing and mastering in Studio Pro in his Home Studio Corner, and also offers three excellent paid courses on recording, mixing, and mastering that are not limited to Studio Pro, but use Studio Pro in the videos.
Step 3: Microphones
The array of microphone types and choices is huge, and personal taste as well as the situation plays a huge role. Most home studios have some dynamic mics (generally moving coil) and some condenser mics.
Dynamic mics: Sturdy, reliable, and often affordable, moving coil dynamic mics convert sound into an electronic signal using electromagnetism. In many live settings and home studios the Shure SM-58 is a workhorse for vocals. It comes in a switchable model which is useful for on-stage work as well as convenience when using it as a talkback mic when collaborating virtually. The Shure SM-57 is similar, but is tailored for use with live instruments, especially recording an amp cabinet. There are countless other choices as well.
Large diaphragm condenser mics are used in the studio for mid to low frequency applications such as vocals, acoustic bass and horns. Many modern large diaphragm condensers such as the Warm Audio or the Roswell Pro Audio mics attempt to emulate the classic Neumann mics at a more affordable price point.
Small diaphragm condenser mics are used for higher frequency capture such as drum overheads (cymbals) or orchestral woodwinds.
When looking to mic a drum kit, it is often more affordable to buy a set of mics designed for the kit such as the 7 piece Audix DP7 set or the very affordable Presonus DM-7 set.
You will need XLR cables for each of the mics to connect it to your interface, as well as mic stands.
Step 4: Amp Emulators
Amp modeling plug-ins allow an electric guitar or electric bass player to plug directly into an instrument level input on the recording interface using an instrument cable and then add a myriad of software and sample based sounds to that dry (no effects) signal inside the DAW. The recorded signal is dry and the mixing engineer adds effects during the mixing sessions later either by adjusting the amp simulator to taste, or by re-amping the track - playing the dry signal out from a monitor channel of the interface through a re-amp box which is connected to the amp head and cabinet of choice (as well as a physical pedal board if desired), and then recording that live with a mic.
During the tracking session the player hears the amp modeler output in the monitor mix, but then the mix engineer can take more time making creative choices later. Aside from the convenience of a player walking into a session (or gig) with only their guitar/bass and no amp head or cabinet it can alleviate some of the anxiety of a time pressured tracking session.
Sims are also great for tracking rooms (like mine) that don't have separate booths for miked instruments to prevent bleed. If I am recording with a miked acoustic bass I will use a modeler on the guitar and eDrums for tracking to allow for only one miked position in the room (or even none), making my job a lot easier (especially since I usually play and engineer at the same time). Although I love the Superior Drummer 3 sounds that I use on my eDrums, if I do want my acoustic drums on the final track I just re-record and substitute an acoustic drum track later on my own time.
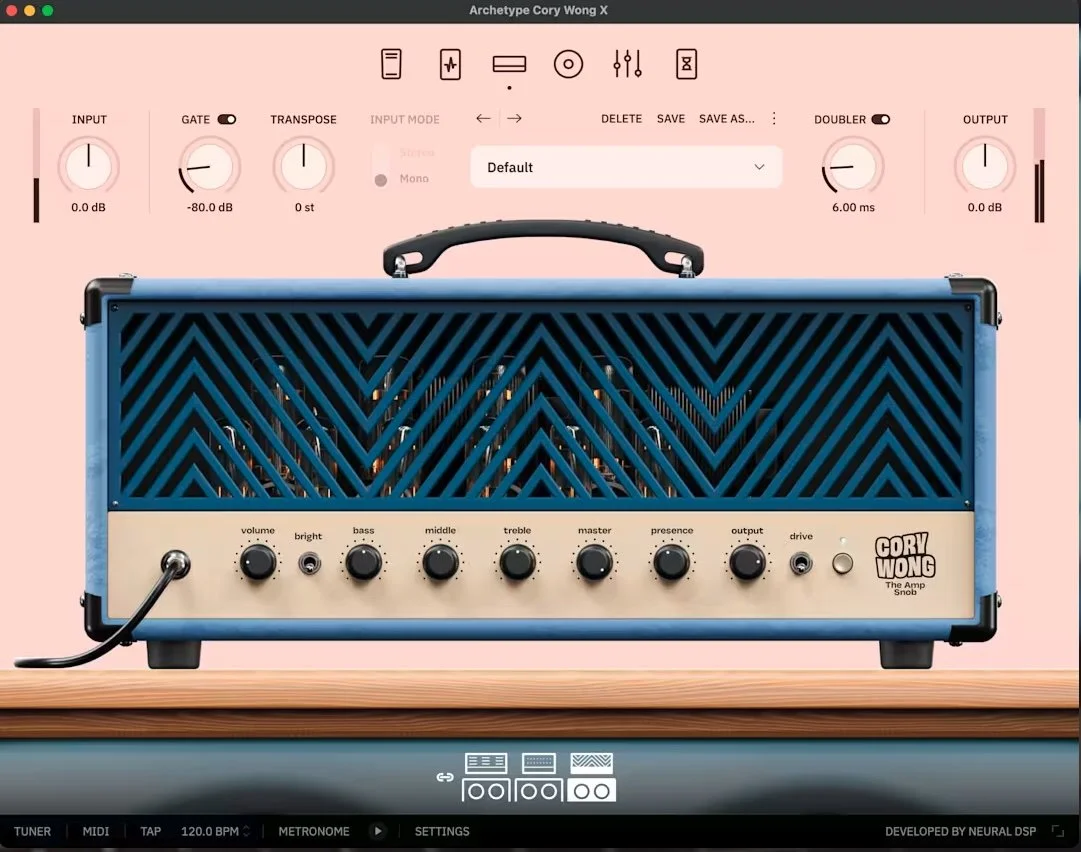
My current go to amp modeler is the Neural DSP Archetype: Cory Wong X for both guitar and bass. I also use Fender’s Mustang (guitar) and Rumble (bass) Native amp sim plug-ins (free with my Presonus Studio One+ monthly subscription). Other popular amp simulators include Amplitube, Guitar Rig, and Waves GTR3.
Step 5: Headphones and Headphone Amp or Personal Monitoring System
You'll need at least one pair of headphones for tracking. The classic choice (which I use) are the Sony MDR-7506 headphones. They are light, comfortable, and sonically solid.
Most interfaces have two headphone jacks, so if you are recording one artist and using one audio engineer, you are set. But if you are recording the whole band at once, you will need a way of sending each person a headphone mix. The most straightforward approach is a distributed headphone amp. In its simplest configuration you route the main outs (or the first pair of line outs if you have connected your studio monitors to the main outs) from your interface to the main in of the headphone amp. All headphone amps will allow you to send the same monitor mix to all of the musicians, and some will let you mix the main mix with a “more me” mix of just that musician.
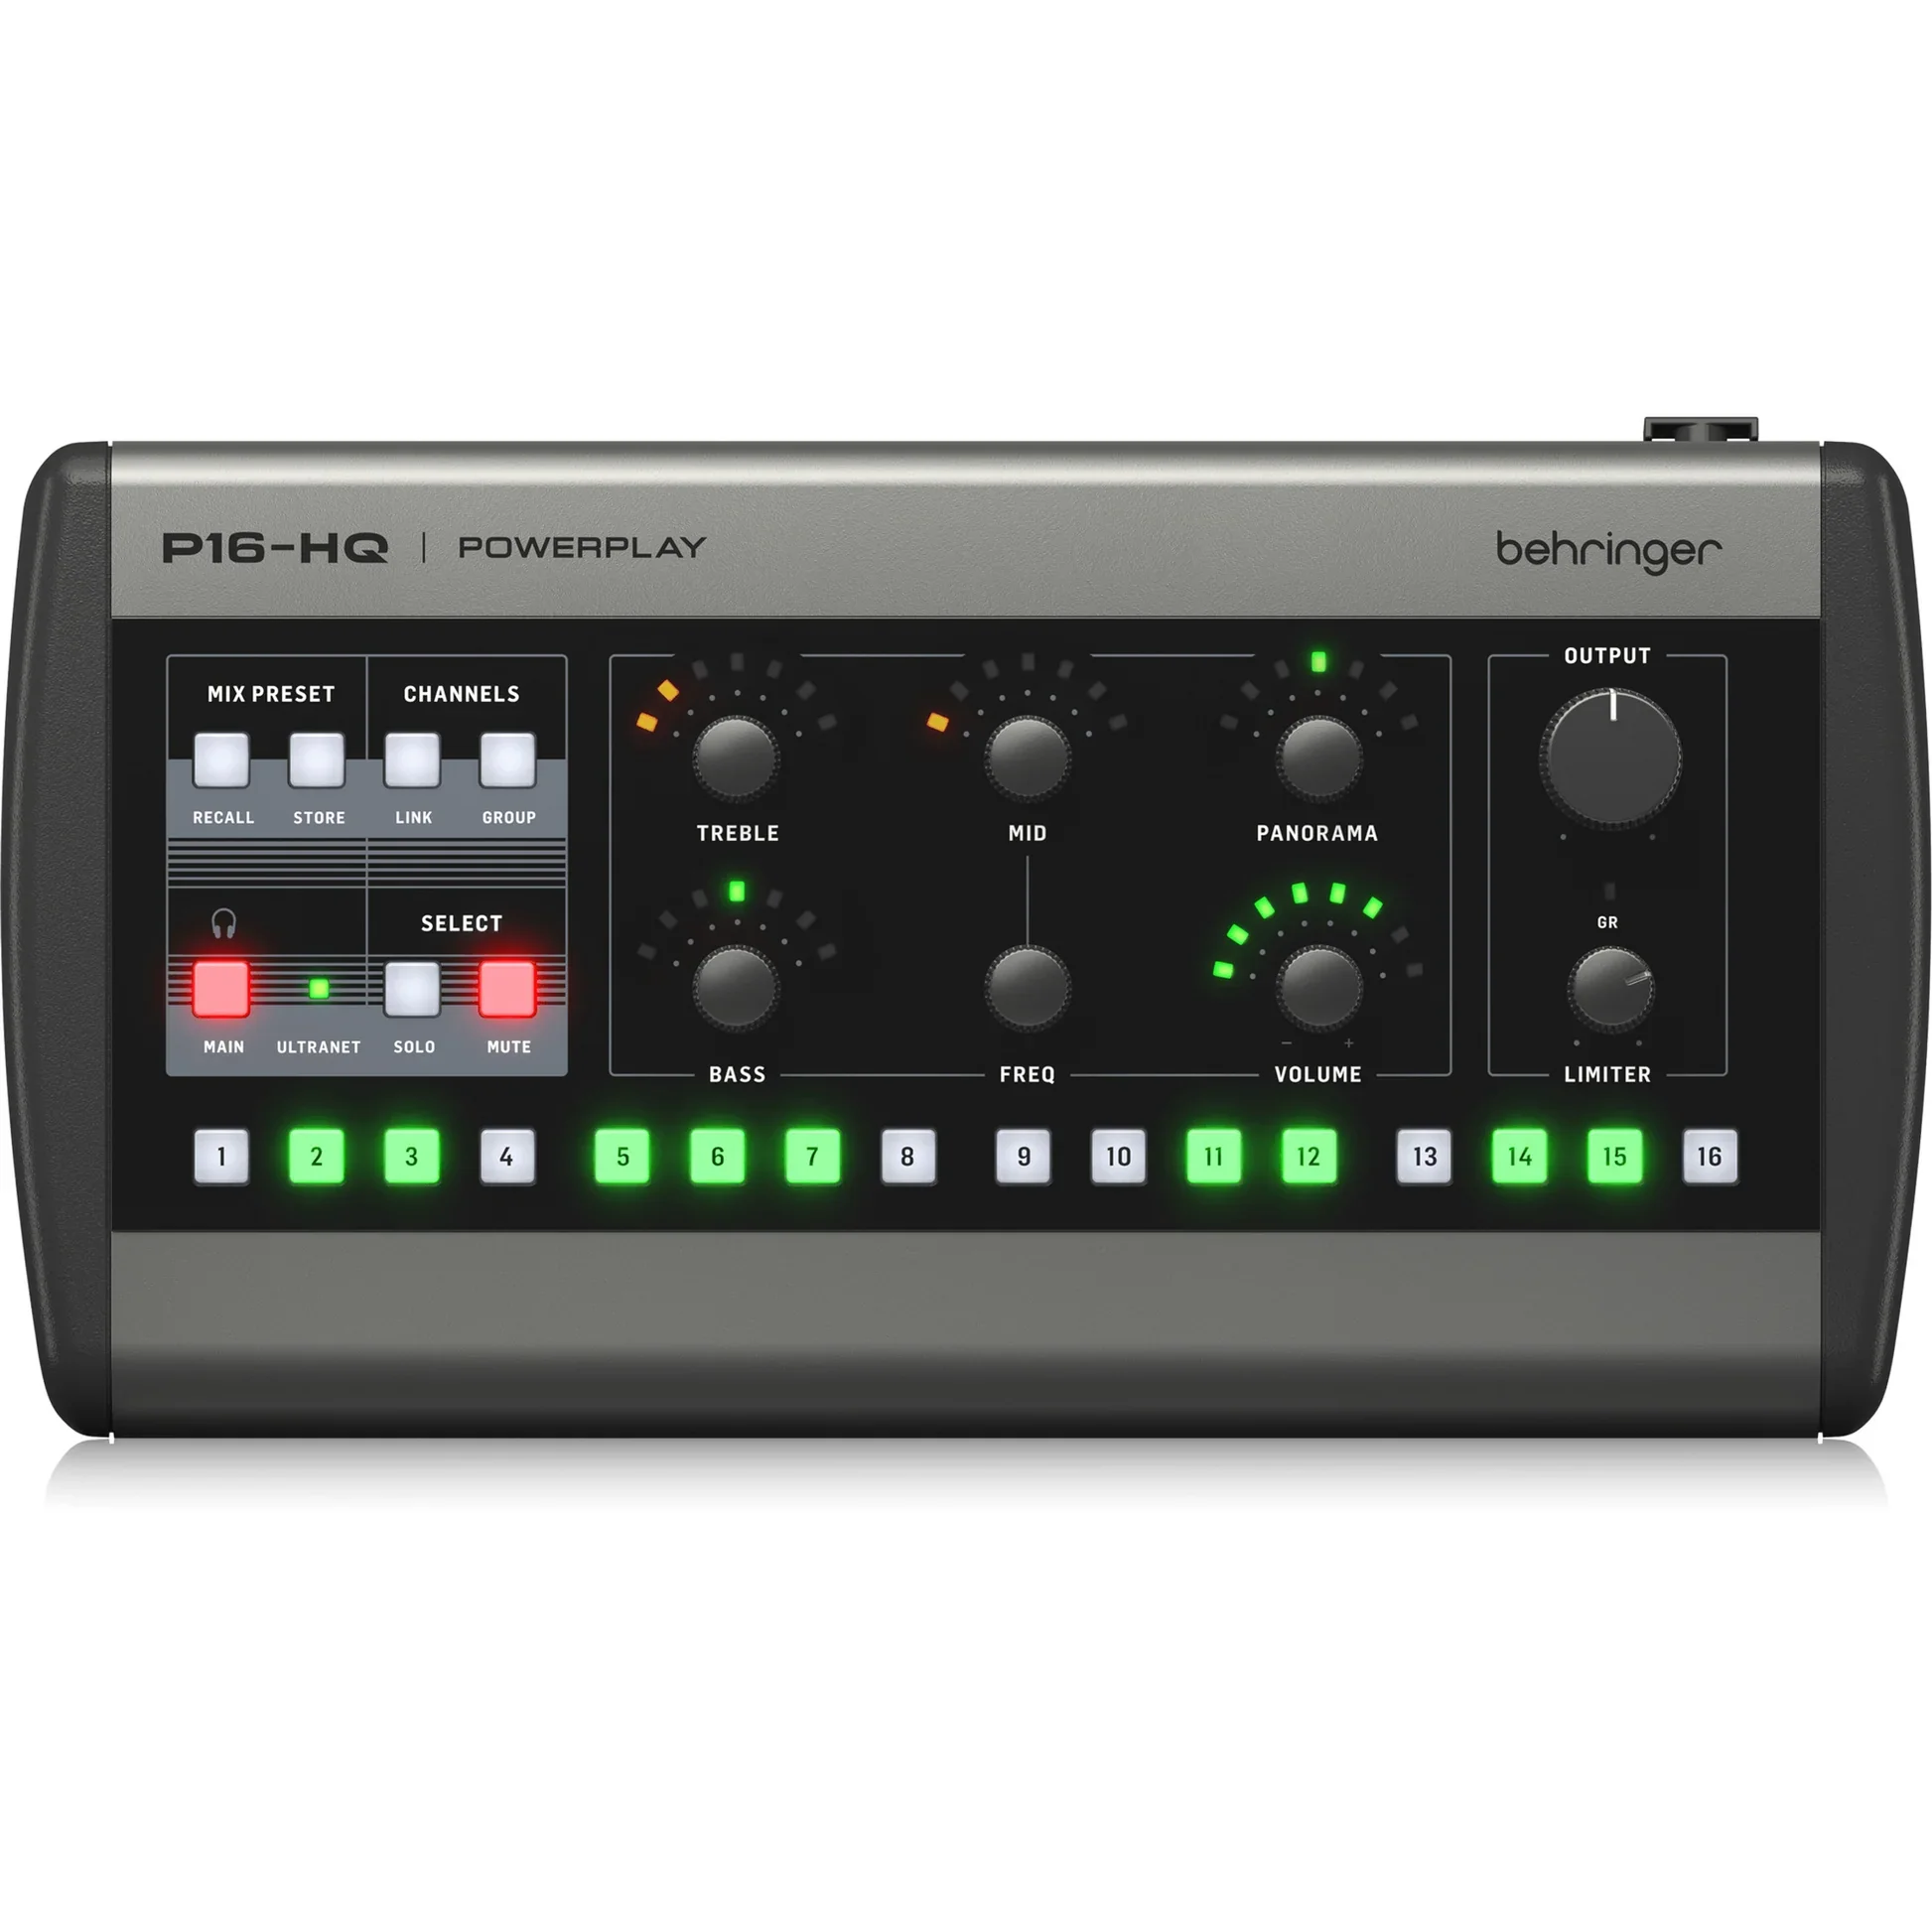
The next step up is to go with personal monitor stations for your musicians. Not only does that make each musician happy, but it also means there is one less thing for the engineer (who in my case is also trying to be a musician) to do. The P16-HQ digital personal monitor stations (which I use) are great and by far the most affordable. You will need the Behringer P16-I to route up to 16 channels in (8 stereo pairs) of analog or digital (ADAT) bus channels (drums, keys, bass, etc.) from your interface monitor outs to up to 6 P16-HQs via ethernet cable. If you need more than 6 monitor stations you can expand to up to 48 P-16HQs by connecting up to 6 P16-D distributors (one in each ultranet out of the P16-I). So if you need 7-13 stations, you connect one P16-D to one of the P16-I ultranet outs, leaving 5 outs on the P16-I for stations, and then up to 8 more from the P16-D.